This website uses cookies to ensure you get the best experience on our website.
- Table of Contents
We provide the step-by-step protocols for IHC-P, IHC-F, and ICC/IF to help you improve your assay performance and obtain clear result images.
Boster Bio provides step-by-step protocols for IHC-Paraffin (IHC-P), IHC-Frozen (IHC-F), and Immunocytochemistry/Immunofluorescence (ICC/IF) to support high-quality staining outcomes. These protocols cover sample preparation, reagent handling, and staining workflows.
Standardization is one of the most challenging aspects for the implementation of successful biospecimen staining. In an effort to accelerate your immunostaining of tissue sections and cell climbing slices, we have developed and validated our step-by-step IHC/ICC/IF protocols to cover biospecimen preparation and assay procedures. We believe these protocols will be a useful resource for your staining workflow or at least a good starting point for further protocol optimization if necessary. For each of the protocols, we also provide a summary flow chart with the applicable Boster’s reagents to enhance your product search on our website.
Get a unique combination of service quality, subject expertise and cost savings, when it comes to IHC service.
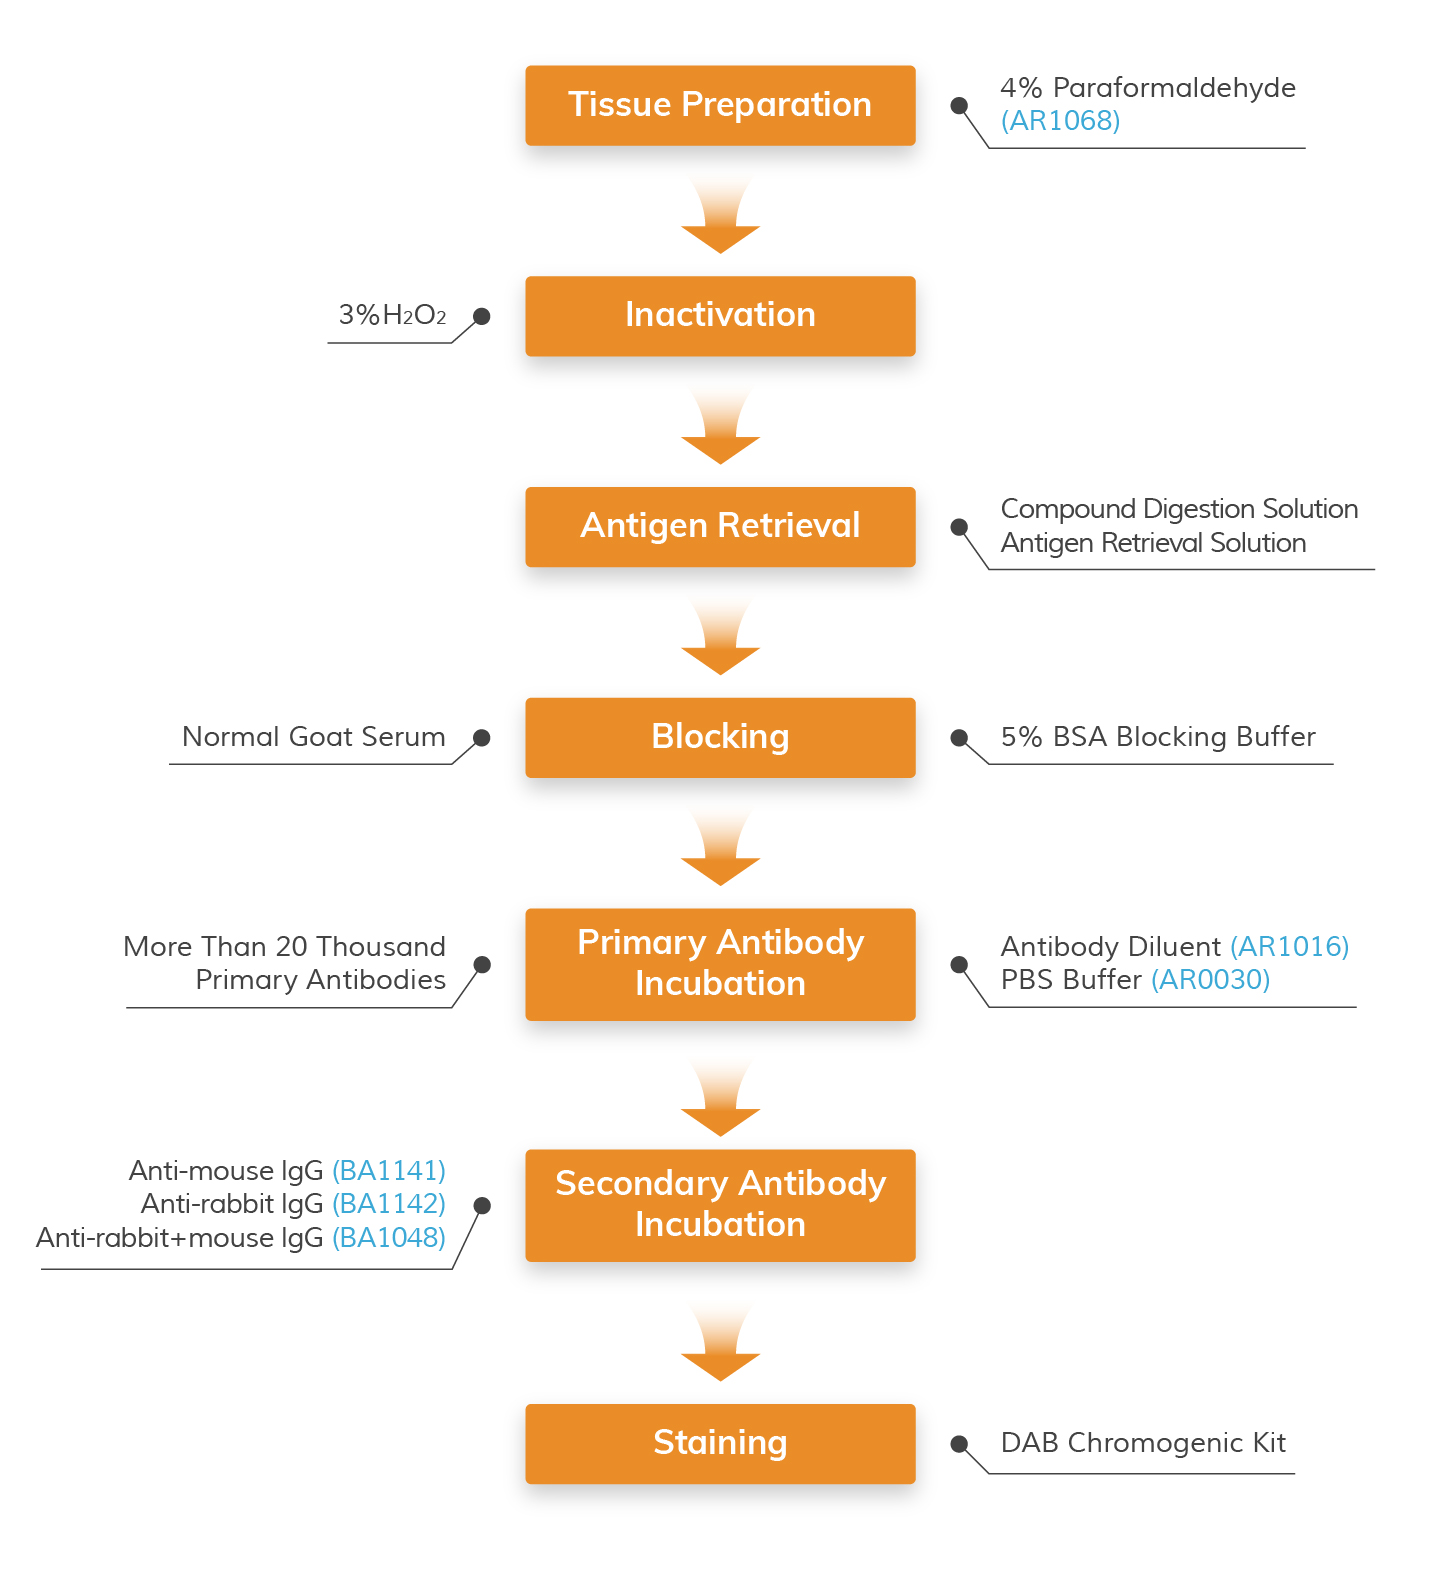
Boster manufactures IHC reagents that are used in our own validation processes. See the IHC protocol below with available Boster products highlighted.

IHC Workflow (Paraffin-Embedded Sections) with Applicable Boster Reagents
You can save up to 90% on the above reagents if you buy them from Boster Bio
Step-by-step guide for IHC-P protocol with reagent recommendations
Note: This fixation procedure using paraformaldehyde and formalin fixatives may cause autofluorescence in the green spectrum. In this case, you may try fluorophores in the (i) red range or (ii) infrared range if you have an infrared detection system.
Prepare the following reagents:
To quench endogenous peroxidase activity, incubate the tissue with peroxidase reagent (1:10 30%H2O2: water) for 10 minutes at room temperature. Wash the slides with distilled water three times.
Used Products: 3% Hydrogen Peroxide
Used Products: Citrate Buffer Powder , EDTA
Heat-induced epitope retrieval: Immerse the slides in antigen retrieval buffer (EDTA buffer, pH 8.0). Microwave the solution at Medium-high power for 8 minutes. Cool the slides for 5 minutes. Then microwave the solution at High power for 4 minutes. Cool the slides to room temperature.
Used Products: Normal Rabbit Serum
Used Products: Antibody Diluent ,PBS Buffer
Used Products: Antibody Diluent
Used Products: DAB Chromogenic Substrate Kit (BrownDAB Chromogenic Substrate Kit (Blue) ,AEC Substrate Kit , Hematoxylin , Nuclear Fast Red
*If the staining background is too high, wash the section 4X with 0.01-0.02% TWEEN 20 PBS and 2X with pure PBS after the SABC reaction and before DAB staining. Then use DAB to stain the samples.
Learn the probable causes and solutions of weak or no stainingBoster manufactures IHC reagents that are used in our own validation processes. See the IHC protocol below with available Boster products highlighted.
IHC Workflow (Frozen Sections) with Applicable Boster Reagents
Step-by-step guide for IHC-F protocol with reagent recommendations
Products Listed: - 4% Paraformaldehyde
* The mold can simply be made by using tin foil
Products Listed: 3% H2O2
Products Listed: Enzyme Antigen Retrieval Reagent - PBS Buffer
Products Listed: 5% BSA blocking solution
Products Listed: Antibody Diluent - PBS Buffer
Products Listed: Antibody Diluent - PBS Buffer
DAB Chromogenic Substrate Kit (BrownDAB Chromogenic Substrate Kit (Blue) ,AEC Substrate Kit , Hematoxylin , Nuclear Fast Red ,PBS
Boster offers the full range of reagents one needs for performing smooth immunohistochemistry (IHC), immunofluorescence (IF), and immunocytochemistry (ICC) assays. See the protocol below with available Boster products highlighted.
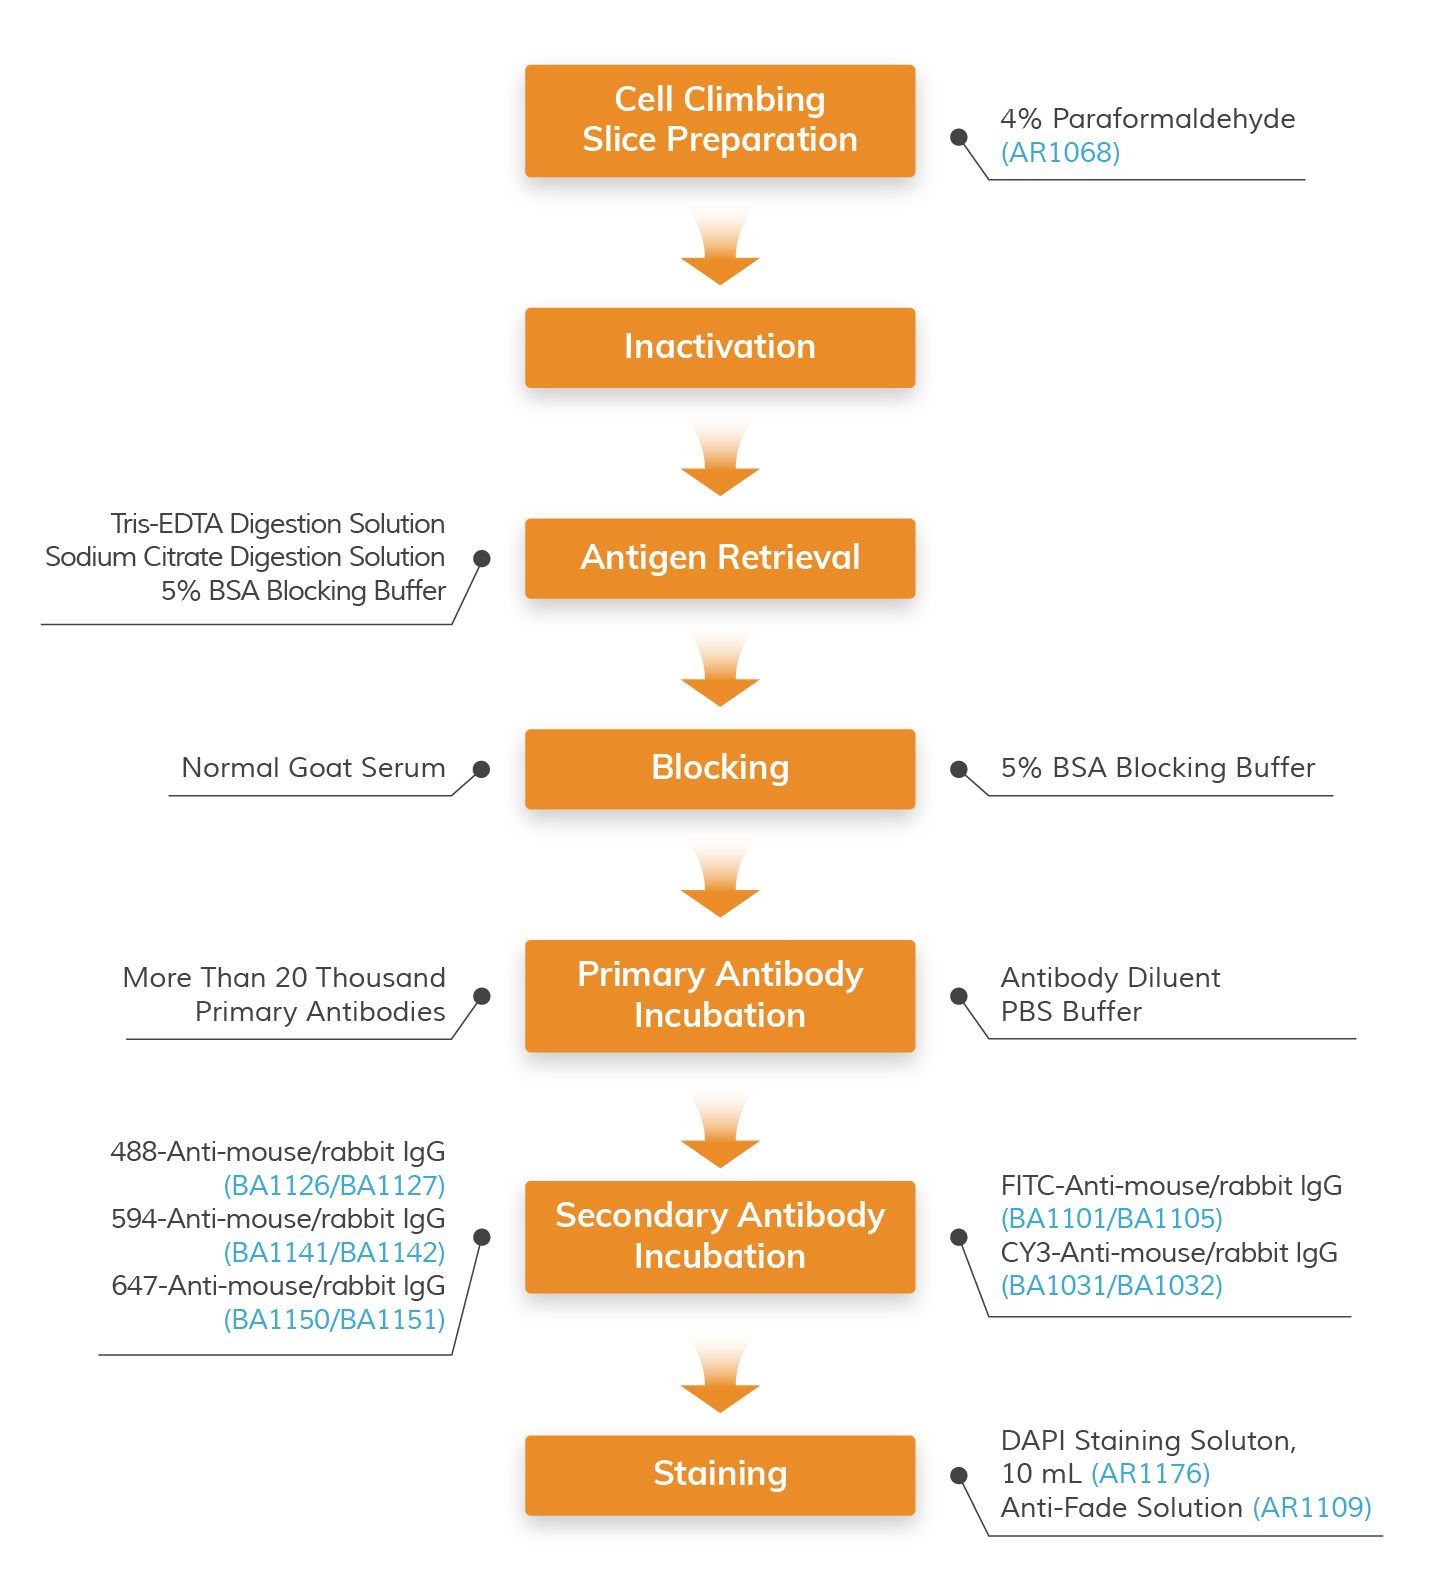
Immunocytochemistry (ICC) Workflow with Applicable Boster’s Reagents
Step-by-step guide for ICC/IF protocol with reagent recommendations
Products Listed: 4% Paraformaldehyde
Products Listed: 3% H2O2
Products Listed: Enzyme Antigen Retrieval Reagent -
Read on how you can effectively select the right antigen retrieval method
Products Listed:5% BSA blocking solution
Products Listed: Antibody Diluent - PBS Buffer
Products Listed: Antibody Diluent - PBS Buffer
Learn the probable causes and solutions of weak or no staining
Learn the basic principle of immunohistochemistry (IHC), including how antibodies bind specifically to antigens in tissue sections for target detection.
Explore key IHC optimization tips for antigen retrieval, fixation, and embedding to improve staining quality and experimental consistency.
Review practical IHC troubleshooting tips for weak staining, high background, and non-specific staining to improve result interpretation.
Learn sample preparation methods for IHC and ICC/IF, including preserved tissue handling steps that support high-quality staining results.
Troubleshoot multiplex IF issues such as bleed-through, weak signal, and high background with practical controls and quick checks.
When an IHC slide looks weak or unexpectedly blank, start with the stain—not the antibody.
High background in DAB staining usually shows up as one of three patterns: a global brown/gray haze, edge-darkening, or granular brown speckling.
Learn how to choose fluorophores for multiplex IF based on marker abundance, brightness, and channel planning for cleaner panel design.