This website uses cookies to ensure you get the best experience on our website.
- Table of Contents

Western blot “failures” are often blamed on antibodies, transfer, or blocking. But in many cases, the real bottleneck happens earlier: lysis choice plus lysate handling. A buffer that’s too mild can leave your target behind. A buffer that’s too harsh can produce viscous, debris-rich lysate that smears lanes and raises background. The goal is not “the strongest lysis possible,” but the mildest system that reliably extracts your target with the best signal-to-background—and then handling it in a way that keeps lanes clean.
This post is the very beginning for our Western blot experiment starting from sample prep. If you want broader context (or want to move downstream after lysate quality is solid), these internal hubs are designed to be your next clicks:
Most buffer debates become easy when you answer three questions up front: Where is your target? Does phosphorylation matter? Is the target low abundance? Vendors commonly emphasize the same principle: no single lysis buffer fits every protein, every cell type, or every experiment. Your best workflow is one that picks a rational starting buffer, then validates it quickly with a minimal-variable test.
Your target’s “address” is the most reliable predictor of the lysis strength you need:
If you’re detecting phospho-epitopes, detergent choice matters—but cold chain, speed, and inhibitors matter more. A practical, vendor-aligned habit is: add inhibitors fresh at extraction, keep samples cold, and move fast. In our in-house workflow, we recommend just-in-time inhibitor addition rather than premixing large batches with inhibitors already included.
For low-expression targets, stronger lysis is not always the best first move—stronger lysis can raise background faster than it raises your target band. You usually win by (1) extracting the right compartment, (2) choosing the buffer that gives the best signal-to-background, and (3) using a concentration/enrichment step when the biology demands it (e.g., dilute fluids or secreted targets).
| Principle | What to do |
|---|---|
| Location decides your starting point | Soluble → start mild; nuclear/membrane → start medium; stubborn membrane → escalate; secreted → check supernatant first. |
| Phospho needs protection | Fresh inhibitors + cold handling + speed. |
| Low abundance needs strategy | Prioritize clean signal-to-background; concentrate/enrich if needed instead of endlessly “going stronger.” |
| Item | Why / Notes |
|---|---|
| ☐ Confirm target location (cytosolic / nuclear / membrane / secreted) | Location determines the minimum lysis strength; secreted targets may be in supernatant. |
| ☐ Decide if phosphorylation must be preserved | If yes: keep everything cold, move fast, and add phosphatase inhibitors fresh. |
| ☐ Choose a starting system (NP-40 / RIPA Weak / RIPA Medium / Enhanced RIPA / SDS-WB only) | Start mild for clean SNR; escalate only if extraction is limiting. |
| ☐ Pre-chill lysis buffer to 4°C | Reduces proteolysis/dephosphorylation and improves reproducibility. |
| ☐ Add inhibitors just-in-time (PMSF + EDTA + optional phosphatase cocktail) | Fresh inhibitors protect targets; avoid premixing bulk bottles with inhibitors. |
| ☐ Plan a minimal-variable validation (A/B: NP-40 vs RIPA Medium; +C: SDS existence proof if needed) | Fastest way to pick the best buffer for your sample without endless tweaking. |
| ☐ Define success criteria for this run | Not the strongest band—aim for best signal-to-background with clean lanes. |
| ☐ Record key parameters | Buffer system, lysis time, sonication, and clarification conditions enable repeatability and troubleshooting. |
Choosing a lysis buffer is choosing a tradeoff: extraction yield versus lysate cleanliness. Mild systems (like NP-40) often give clearer lysates and cleaner lanes, but may under-extract nuclear or membrane targets. Stronger systems (RIPA → stronger RIPA variants → SDS) improve extraction of stubborn targets, but they also release more DNA and debris, which means DNA handling and clarification become mandatory to prevent smears and high background.
Boster in-house lysis system definitions (what “RIPA strong/medium/weak” means here)
The word “RIPA” is used loosely across labs. In our in-house workflow, we define lysis strength by active detergent components so that “RIPA weak/medium/enhanced” is unambiguous and reproducible.
| System | Active detergent components (definition) | Strength | Typical use | Boster option (ready-to-use) |
|---|---|---|---|---|
| NP-40 lysis | 1% NP-40 | Mild | WB, IP, co-IP, ELISA (clean lysates; best SNR for soluble targets) | — |
| RIPA (Weak) | 1% NP-40 + 0.25% deoxycholate | Mild–Medium | WB, IP (slightly more stringency without fully “dirtying” the lysate) | — |
| RIPA (Medium) | 1% NP-40 + 0.5% deoxycholate + 0.1% SDS | Medium | WB, IP (workhorse for many nuclear and membrane-associated proteins) | RIPA Lysis Buffer (AR0105) |
| Enhanced RIPA | 1% Triton X-100 + 1% deoxycholate + 0.1% SDS | Strong | WB, IP, co-IP (stubborn nuclear/membrane targets; complex tissues) | Plus RIPA Lysis Buffer (AR0102) |
| SDS lysis | 1× SDS-PAGE sample buffer | Max | WB only (denaturing “existence proof” for very hydrophobic targets). Not for IP/co-IP | — |
A commonly cited baseline RIPA composition is 50 mM Tris-HCl (pH 7.4–8.0), 150 mM NaCl, 1% NP-40 or Triton X-100, 0.5% sodium deoxycholate, and 0.1% SDS. Use this only as a reference point—your optimal buffer depends on target solubility and downstream needs.
Working lysis buffer add-ins (protease/phosphatase protection)
Boster options: Protease Inhibitor Cocktail, EDTA-free (AR1182-1) • Protease Inhibitor Cocktail (AR1182)
If you prefer ready-to-use buffers, see the “Boster option” column in the lysis system table above. Inhibitors and loading buffers are linked where they are used in the workflow.
Prepare working buffer fresh (don’t pre-mix inhibitors into large batches). In our routine workflow, we supplement lysis buffer immediately before use and pre-chill to 4°C:
Some protocols recommend lysing cells directly in 1× SDS sample buffer, then briefly sonicate to shear DNA and reduce viscosity before heating and loading. This is not appropriate for IP workflows, but it can be a powerful diagnostic route when you need a rapid denaturing extraction to confirm the target is detectable under strong conditions.
Split the same sample into:
Hold everything else constant (same inhibitors, same time on ice, same DNA handling if viscous, same clarification). Then compare:
| Item | Why / Notes |
|---|---|
| ☐ Check clarity of the supernatant | Cloudy lysate often predicts higher background; improve disruption and clarification. |
| ☐ Check viscosity (stringy = DNA) | Shear DNA on ice before loading to prevent smears and uneven migration. |
| ☐ Clarify cold and transfer only the supernatant | Debris carryover is a common cause of lane distortion and background. |
| ☐ Record run conditions (buffer + time + sonication + spin) | Makes it easy to reproduce the good conditions and troubleshoot the bad ones. |
| ☐ Normalize protein concentration and keep loading consistent | Consistency is required to compare buffers and interpret results. |
| ☐ Choose a safe denaturation temperature | Default works for most targets; for some membrane proteins, lower temperature can prevent aggregation. |
| ☐ Change one variable at a time if results are still poor | Avoid everything-changed troubleshooting; fix the bottleneck efficiently. |
Great troubleshooters don’t “optimize everything.” They read the lysate like a diagnostic sample. Before you load a gel, ask:
| If you see this… | Do this first |
|---|---|
| Stringy / hard to pipette | Shear DNA on ice until non-viscous, then clarify cold. |
| Cloudy / debris-rich supernatant | Clarify harder; avoid disturbing pellet; improve disruption/homogenization. |
| Smears / lane distortion | Fix viscosity + debris (DNA shearing + clarification) before changing antibodies. |
As lysis strength increases, two issues become disproportionately common: DNA viscosity and insufficient clarification. Vendor protocols commonly recommend high-speed clarification (for example ~14,000 × g for ~15 minutes) to remove debris, and brief sonication to shear DNA when viscosity is high. In our in-house workflow, we use a defined sonication pattern and cold clarification as the default lane-protection steps for many lysates.
The one rescue move that saves most ugly lanes: shear DNA + clarify
If your lysate is stringy, fix DNA first. Viscosity is not “normal”—it is typically genomic DNA, and it can ruin lane quality by causing smears, uneven migration, and poor pipetting.
Why this works: strong lysis increases extraction power, but it also releases DNA and insoluble fragments. DNA shearing reduces viscosity, and clarification removes debris—together they prevent smearing and reduce background without changing antibodies, blocking conditions, or transfer settings.
| What you see | What it usually means | Quick fix (do now) | Confirm (minimal change) |
|---|---|---|---|
| Cloudy / chunky lysate | Incomplete disruption; buffer too mild; tissue not homogenized | Increase mechanical disruption; consider NP-40 → RIPA (Medium); clarify thoroughly | After clarification, supernatant should be cleaner and background should drop |
| Stringy / hard to pipette | Genomic DNA release (common in stronger lysis) | Shear DNA on ice until non-viscous; re-clarify | Pipetting becomes smooth; lane distortion decreases |
| Smearing down the lane | Viscosity + debris carryover; overload | Clarify harder; avoid disturbing pellet; reduce load | Run 1× vs 0.5× load from same lysate |
| High background (“dirty blot”) | Too much total protein + debris; overly harsh extraction for soluble target | Improve clarification; lower loading; consider a milder buffer if target is soluble | NP-40 vs RIPA A/B: choose best SNR |
| No band but housekeeping is strong | Wrong compartment; target secreted; extraction too mild; low abundance | Check supernatant vs pellet; escalate buffer; consider concentration/enrichment | SDS existence proof: if SDS shows band → extraction was limiting |
| Phospho signal inconsistent | Warm handling; inhibitors missing/old; slow workflow | Fresh inhibitors + pre-chill + move fast | Compare fast-cold vs slow workflow |
Different protocols recommend different heating conditions because proteins behave differently (especially membrane proteins). A practical approach is:
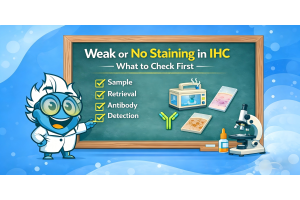
If you’re still seeing artifacts after fixing viscosity and debris, diagnose downstream variables (transfer, antibody dilution, blocking, washing, detection) via the troubleshooting hub: Western blot troubleshooting. If the lysate checks out but bands are still faint, confirm detection chemistry; a higher-sensitivity substrate can help (ECL Plus Substrate (AR1196)).
For a more practical breakdown of timing, sample handling, and when inhibitor protection matters most, see when to add protease and phosphatase inhibitors for Western blot.
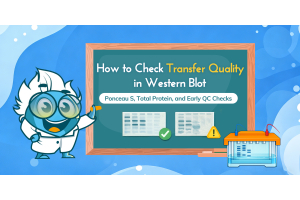
If lysate quality looks acceptable but signal remains weak or uneven, this guide on how to check transfer quality in Western blot can help separate transfer failure from upstream sample-prep problems.
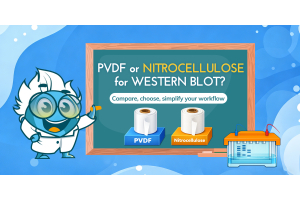
Membrane choice can also affect retention, background, and downstream handling, so this guide on which membrane to choose for Western blot is a useful companion when you are optimizing blot performance beyond sample extraction alone.
If the same blot needs to be reprobed for another target or for loading-control confirmation, this Western blot stripping buffer protocol provides a practical starting point for antibody removal while preserving usable membrane signal.
Once lysate quality, loading consistency, and signal-to-background are under control, the next question is how to turn bands into reliable numbers. This guide on western blot quantification is a useful next step for densitometry, normalization, and fold-change analysis while avoiding saturation-driven misinterpretation.
Cells are comparatively simple. Tissues are not. Tissues bring ECM, lipids, blood proteins, and debris, which is why they demand more mechanical disruption and stricter cleanup. If you use stronger lysis in tissues, treat DNA handling and clarification as mandatory.
| Sample type | Typical pain point | Best practice starting point | Special notes |
|---|---|---|---|
| Cultured cell pellet | Viscosity and overload are common | NP-40 for soluble; RIPA (Medium) for nuclear/membrane | Use ~5–7× pellet volume; shear DNA if viscous |
| Animal tissue | Debris/lipids/background | Often RIPA (Medium) first | Homogenize + clarify; escalate if membrane target is weak |
| Bone tissue | Hard matrix + blood residue | RIPA (Medium) → Enhanced RIPA as needed | Wash well; longer homogenization; strict cleanup |
| Cell culture supernatant | Low abundance (dilute proteins) | Start with supernatant + concentration if needed | Common “secreted target” fix |
| Low expression fluids (e.g., urine/milk/saliva) | Too little protein | Concentrate / enrich first | Don’t try to solve dilution with harsher lysis |
Start with NP-40 for cytosolic/soluble targets when you want the cleanest SNR. Start with RIPA (Medium) when the target is nuclear, membrane-associated, or when NP-40 under-extracts. If unsure, do the NP-40 vs RIPA A/B test once and stop guessing.
Use Enhanced RIPA for stubborn membrane/nuclear targets (especially from complex tissues). Use SDS lysis (1% SDS) as a WB-only denaturing existence proof when you need to confirm detectability under strong conditions.
Dilution helps pipetting but often reduces signal. The better fix is DNA shearing plus clarification: sonicate on ice until non-viscous, then clarify cold and load from the clean supernatant.
A practical starting point for many mini-gel lanes is 20–30 µg total protein for cell/tissue lysates (then adjust based on target abundance and antibody performance). Keep loading consistent when comparing buffers.
Run the minimal-variable A/B test (NP-40 vs RIPA Medium) on the same sample, with identical inhibitor addition, DNA handling, clarification, and loading. Choose the buffer that yields the best target band with the cleanest background.
Mahmood, T., & Yang, P.-C. (2012). Western blot: Technique, theory, and trouble shooting. North American Journal of Medical Sciences, 4(9), 429–434. https://doi.org/10.4103/1947-2714.100998
Kurien, B. T., & Scofield, R. H. (2015). Western blotting: An introduction. Methods in Molecular Biology, 1312, 17–30. https://doi.org/10.1007/978-1-4939-2694-7_5
Peach, M., Marsh, N., Miskiewicz, E. I., & MacPhee, D. J. (2015). Solubilization of proteins: The importance of lysis buffer choice. In B. T. Kurien & R. H. Scofield (Eds.), Western blotting: Methods and protocols (Methods in Molecular Biology, Vol. 1312, pp. 49–60). Humana Press. https://doi.org/10.1007/978-1-4939-2694-7_8
Ngoka, L. C. M. (2008). Sample prep for proteomics of breast cancer: Proteomics and gene ontology reveal dramatic differences in protein solubilization preferences of radioimmunoprecipitation assay and urea lysis buffers. Proteome Science, 6, 30. https://doi.org/10.1186/1477-5956-6-30