This website uses cookies to ensure you get the best experience on our website.
- Table of Contents
A verification-first workflow to prevent ghost bands and high background.
Western blot “failures” are often pinned on antibodies, transfer, or blocking. But when you’re stripping and re-probing, the make-or-break step is simpler: whether round one antibodies are truly removed without damaging what you’re trying to detect next. The goal is a verification-first stripping protocol that keeps signal-to-background high—so round two reads like biology, not carryover.
If you want broader context (or want to move downstream after your workflow is solid), these internal hubs are designed to be your next clicks:
Stripping and re-probing is most useful when it replaces a full rerun—another gel, another transfer, and another antibody cycle—without compromising interpretability. The workflow below focuses on the two outcomes that matter most in practice: avoiding antibody carryover that becomes ghost bands, and preserving immobilized protein so your second-round signal doesn’t collapse into background.
Stripping is worth doing when reusing the membrane genuinely replaces a full gel/transfer cycle. But it can become a time sink when your first-round signal is already near the detection limit or your experiment requires strict quantitative comparability across conditions. When you’re unsure whether your problem is stripping-related or coming from upstream steps, it’s often faster to cross-check your baseline workflow against the Western blot troubleshooting library before you change stripping conditions.
Table 1. Strip & re-probe vs rerun: a decision guide
| Situation | Strip & re-probe is usually a good idea | Rerun is usually the safer choice |
|---|---|---|
| Sample amount | Sample is limited and lanes are precious | Sample is not limiting |
| Signal strength | First-round bands are clear and usable | First-round bands are weak or near background |
| Targets | You need two targets, or phospho → total | You need many targets across many rounds |
| Data requirements | Confirmatory readout or limited reprobing | Strict quantitation with minimal added variability |
| Risk tolerance | You can accept 1–2 reprobing rounds | You can’t risk losing a low-abundance target |
A practical rule that saves time: if the band is barely above background in round one, stripping rarely “rescues” the experiment. It usually increases variability and makes the second round harder to interpret.
Quantitation note: Reprobing is best for adding a second readout or confirming changes. If you need publication-grade quantitation across multiple rounds, rerunning separate blots is typically more defensible than relying on many stripping cycles.
A stripping protocol only works when it removes antibodies without stripping away what you actually need—the immobilized protein. For that reason, the safest default is to start with milder stripping conditions and escalate only when you have evidence that antibodies remain. Many ghost band and background issues are not caused by “weak stripping,” but by incomplete removal of stripping reagents and antibody fragments during washing.
Bench note (scope): Stripping performance depends strongly on membrane type (PVDF vs nitrocellulose), detection chemistry (HRP/ECL vs fluorescence), and antibody affinity. Treat “mild vs harsh” as a range rather than a single recipe, and validate with the secondary-only check on your specific membrane + detection setup.
Table 2. Mild vs harsh western blot stripping: typical outcomes
| Approach | Best for | What can go wrong | What to adjust first |
|---|---|---|---|
| Mild stripping | Preserving signal; first attempt; sensitive targets | Residual antibodies → ghost bands | Improve wash exchanges; verify with secondary-only check; repeat stripping incrementally |
| Harsh stripping | Stubborn carryover after verification | Protein loss → weaker bands; surface stress → higher background | Shorten exposure; step down force; keep rounds limited |
The protocol below is designed to keep reprobing predictable. The key idea is that verification is part of the protocol—not an optional add-on.

Verification-first workflow. Strip gently, wash thoroughly, then use a secondary-only check before re-probing. (Click to open full-size.)
Start with the mildest stripping condition that can remove bound antibodies. If you’re unsure, avoid defaulting to long incubations. Over-stripping can reduce recoverable signal and can also make background harder to control in later rounds.
Wash thoroughly in TBST (or your standard wash buffer). What matters most is not just wash time; it’s whether you are doing full solution exchanges to remove stripping reagents and any released antibody material. If you’re standardizing your workflow for consistency, your choice of buffers, substrates, membranes, and related essentials often lives in one place—your Western blot reagents setup.
What we mean by “buffer exchange”: replace the wash buffer with fresh TBST each time under agitation, rather than extending a single wash in the same buffer.
After stripping and washing, incubate the membrane with secondary antibody only (no primary), wash, then do a short exposure. This is the fastest, most reliable way to detect residual antibody signal before you invest in another full primary incubation.
Secondary-only check (operational definition): re-block the membrane, incubate with the same secondary used in round one (same species and detection chemistry), wash under the same rules, then take a short exposure that would have detected the original band. Use your round-one exposure as a reference point; the goal is to detect residual signal without overexposing the membrane. This check is only interpretable when the secondary and detection settings match what you used previously.
Table 3. Secondary-only check: how to confirm stripping worked
| What you see | Most likely meaning | What to do next |
|---|---|---|
| Clear bands (especially at prior target MW) | Antibody carryover or incomplete stripping | Increase TBST wash exchanges; repeat stripping incrementally; re-check |
| Diffuse haze / elevated background | Residual stripping reagent or insufficient re-blocking | Wash more thoroughly; re-block longer; lower secondary concentration |
| Clean image (no bands) | Membrane is ready for reprobing | Proceed to re-blocking and primary incubation |

Secondary-only check. Use the pattern to decide whether to wash more, strip again, or proceed to re-probing. (Click to open full-size.)
Re-blocking helps stabilize membrane surface behavior after stripping. When you re-probe, start with a validated antibody dilution rather than increasing concentration to “force” signal—on post-strip membranes, aggressive antibody concentrations often increase background faster than true signal.
Reprobing order tip: probe the most sensitive/low-abundance target first (before the membrane sees repeated processing), then reprobe higher-abundance targets or loading controls later. If phospho/total is your goal, phospho is typically probed first, then strip and probe total protein.
If your second round is aimed at a loading control, plan that choice deliberately. Many workflows rely on a stable loading control as the anchor for interpretation; for options that match your species and sample type, see Loading control antibodies. If your experiment depends on rigorous normalization across conditions, it also helps to align your strategy with Total protein normalization vs loading control antibodies before you decide which readout belongs in which round.
A realistic operating range is one to two reprobing rounds. Additional rounds can work, but signal loss and background drift become increasingly likely, especially for low-abundance targets.
When reprobing fails, the symptom usually points directly to the correct lever. Ghost bands indicate antibody carryover, which is best addressed by washing and verification before escalating stripping strength. Weak second-round signal points toward over-stripping and calls for milder conditions or shorter exposure. Background haze commonly reflects residue and membrane surface effects, so washing and re-blocking dominate the fix. For pattern matching and upstream checks, the Western blot troubleshooting library is often the fastest way to identify whether you’re seeing carryover, non-specific binding, or a transfer/sample issue that stripping won’t solve.
If your experiment requires multiple targets with defensible comparability, the “one membrane, many rounds” strategy often stops being efficient. In those cases, rerunning separate blots—or outsourcing a critical target to a Western blotting service workflow—can be faster than repeated stripping iterations, especially when sample is limited or the target is low-abundance.
A western blot stripping buffer removes bound antibodies (primary and/or secondary) from the membrane so the blot can be probed again for a different target.
A reliable protocol uses the mildest stripping condition that works, thorough TBST washes with full exchanges, and a secondary-only verification step before reprobing.
Use a secondary-only check after stripping. If bands remain, improve washing first and repeat stripping incrementally before reprobing.
High background is often caused by incomplete removal of stripping reagents, insufficient re-blocking, or overly concentrated antibod...

When was the last time you read the buffer section of your protocol instead of just skipping to the fun part—primary antibody incubation? Let’s be honest: for many of us, the blocking step is that quiet moment between coffee and confusion. But while often overlooked, the blocking agent you choose can make or break your experiment—and one of the most dependable names in that game is Bovine Serum Albumin, or BSA.
In this article, we take a deep dive into the science and subtlety of this humble protein—from its origins to its performance in dilution buffers, and how it stacks up against its rivals like non-fat dry milk and fish gelatin.
The story of Bovine Serum Albumin (BSA) stretches back to the 19th century, when German and Swedish chemists first separated serum proteins such as albumins and globulins from animal blood. The term “albumin” itself was already in use by the early 1800s, when French chemist Antoine Fourcroy and his contemporaries described this class of water-soluble, heat-coagulable proteins. As protein chemistry advanced, BSA was eventually isolated on its own in the late 19th to early 20th century. By the 1930s–40s, American scientist Edwin J. Cohn developed large-scale purification methods through isoelectric precipitation and plasma fractionation (the famous “Cohn fractionation”), establishing BSA as a reliable tool for experimental research. During World War II, U.S. military and NIH efforts to develop blood plasma substitutes further accelerated improvements in protein purification. While human serum albumin became the standard for clinical use, the purification of BSA played a critical role in refining protein separation technology and cemented its place in laboratory science.
Following its historical development and large-scale purification, Bovine Serum Albumin (BSA) is recognized today as a well-characterized globular protein derived from cow blood serum. As the most abundant protein in bovine plasma, BSA plays essential physiological roles in the animal, including maintaining osmotic pressure and transporting fatty acids, hormones, and other small molecules.
From a molecular perspective, BSA is approximately 66.5 kDa in size and consists of 583 amino acids arranged into a heart-shaped three-domain structure. This configuration imparts remarkable stability across a wide pH range (pH 4–9) and thermal resilience, features that make BSA particularly suitable for in vitro experimental applications. Beyond its structural robustness, BSA’s chemical inertness, high solubility, and compatibility with sensitive immunoassays underpin its ubiquitous presence on laboratory benches worldwide.
In immunoassays like ELISA, Western blot, and IHC, the blocking step prevents antibodies from binding nonspecifically to unoccupied surfaces. If ignored or done poorly, the result is often high background noise and unreliable data.
Enter BSA. Its widespread use as a blocking agent is thanks to three main features:
• Low cross-reactivity: BSA is unlikely to bind to antibodies or interfere with antigen-antibody interactions, especially in mammalian systems.
• Surface coverage: Its globular nature helps it evenly coat unbound plastic or membrane surfaces.
• Chemical compatibility: BSA tends to remain stable across a wide range of buffer systems and temperatures, and doesn’t degrade easily under typical assay conditions.
In essence, BSA acts like an invisible wallpaper—it quietly occupies all the real estate your antibodies might otherwise stick to accidentally, making sure only the intended interactions show up on your blot or plate.
Beyond blocking, BSA is frequently added to antibody dilution buffers. But its role here goes beyond background suppression. In these scenarios, BSA offers protein stabilization, antibody preservation, and reduction of denaturation risk, especially in working solutions that may be stored for extended periods or exposed to slight agitation or heat.
At concentrations around 0.1%–1%, BSA helps maintain antibody structure and function, especially for sensitive monoclonal antibodies or those used at very low concentrations. It also reduces the risk of antibody adsorption to plastic tubes or pipette tips—a subtle but significant source of signal loss in low-volume experiments.
Of course, BSA isn’t the only protein blocker on the scene. Here’s how it compares with several popular alternatives:
| Blocking Reagent | Origin | Cross-reactivity Risk | Fluorescence Compatibility | Shelf Stability | Typical Use Cases |
|---|---|---|---|---|---|
| BSA | Bovine serum | Low | High | Excellent | ELISA, WB, IHC, IF |
| Non-fat dry milk | Skim milk (casein) | Moderate (due to IgG) | Poor with HRP & phospho | Moderate | Western blot |
| Fish gelatin | Cold water fish | Low | Good | Moderate | IF, IHC (fluorescent dyes) |
| Normal goat serum | Goat plasma | Medium | Good | Fair | IHC/IF (species-matched) |
| Casein | Milk protein | High (esp. for phospho) | Poor with phospho detection | Moderate | ELISA (non-phospho) |
Key Takeaways:
• BSA is ideal for experiments requiring low background and high consistency.
• Non-fat dry milk is cheaper but riskier in sensitive detection systems.
• Fish gelatin is a strong contender in fluorescent applications.
• Serum-based blockers introduce species-specific variables and should be matched carefully.
Despite its popularity, BSA isn’t perfect for every situation.
• Biotin-based assays: BSA contains trace levels of biotin, which can interfere with avidin-biotin systems, leading to false positives or increased background noise.
• Phospho-specific antibody work: Some BSA formulations may contain minor impurities th


Buffers are a staple in nearly every molecular biology experiment—but not all buffers are created equal. When working with antibodies, ELISA, IHC, IF, or IP, the difference between PBS and PBST, or TBS and TBST, can greatly affect your results.
In this quick guide, we’ll compare four of the most common buffers used in immunoassays and help you choose the right one for your experiment.
| Name | Description | Basic Components | Common Uses | Characteristics | Recommended Use Cases |
|---|---|---|---|---|---|
| PBS | Phosphate-Buffered Saline | NaCl + K |


Protease inhibitor cocktails are chemical compounds that act to protect and maintain cellular protein composition after lysis of a cell, preventing natural degradation. They play an important role in protein quantification analysis, rendering the protease ineffective while obtaining appropriate protein purification yields. Protease inhibitors are classified by either the type of protease they act on or their mechanism of actions.
Proteases are enzymes that degrade proteins, playing an important role in cellular protein catabolism. Through their interaction with the proteins, they influence their activity and production of bioactive molecules, cellular repair, and the degradation of extracellular material. Proteases are also vital for food...
DAPI, or 4',6-Diamidino-2-Phenylindole, Dihydrochloride, is a commonly used fluorescent dye that binds to double-stranded DNA (dsDNA).
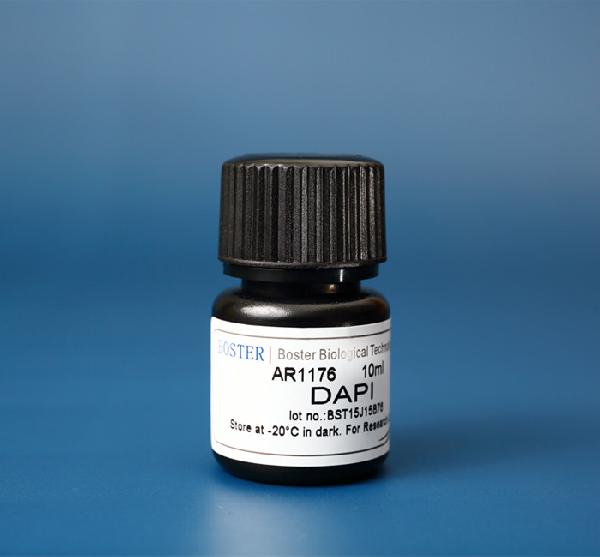
DAPI binds to and ‘stains’ double-stranded DNA, preferably binding to A-T-rich regions in DNA. DAPI stain is excited by ultraviolet (UV) light, with its largest excitation wavelength at ~360nm, and it produces a vibrant blue color with its largest emission wavelength at ~460nm when bound to DNA. Due to its fluorescent properties and rich blue color, it is readily used for visualization in fluorescence microscopy and other assays. Because it can pass through the cell membrane and stain DNA, DAPI is a useful dye for nuclear quantification and has been utilized in numerous assays, such as live or fixed cell staining, cell viability assays, flow cytometry, cell cycle analysis, mycoplasma contamination detection and in fluorescence microscopy. In fluorescence-based tissue analysis, especially where nuclear visualization guides diagnostic interpretation, accurate identification of morphological patterns is often supported by expert Pathology Review, complementing the use of nuclear dyes like DAPI. Because of its wide range of applications, Boster offers an affordable DAPI stain solution (Catalog# AR1176) that has been validated and cited in several publications.
Cell cycle analysis & flow cytometry
Since DAPI binds to DNA, it can be used to determine the relative amount of DNA in cells for cell cycle analysis. Cells currently in the G2 phase of mitosis will have twice the amount of DNA as cells in the G1 phase of mitosis, which will be reflected in the amount of fluorescence from DAPI in each cell. Apoptotic cells will have less DNA than a single cell, since DNA is being deg...