This website uses cookies to ensure you get the best experience on our website.


- Table of Contents
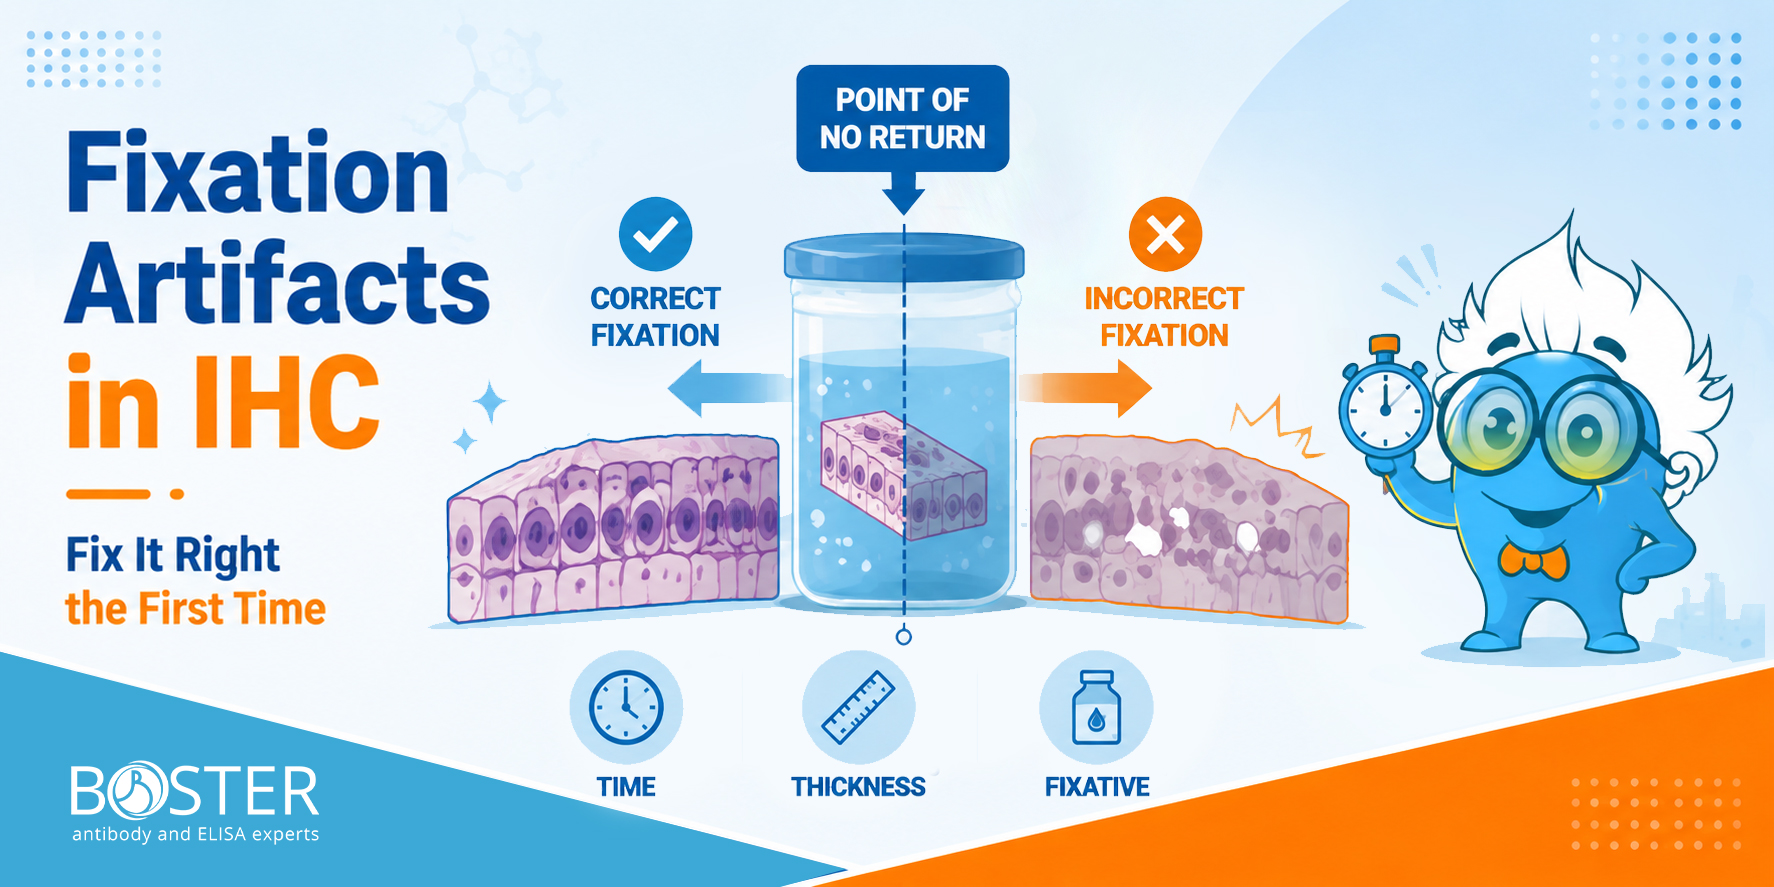
Fixation artifacts are difficult to reverse and may compromise IHC interpretation. Unlike most laboratory mistakes, poor tissue fixation cannot be corrected downstream. This guide covers every critical variable in the fixation workflow so your IHC biomarker data stays reliable across longitudinal studies.
In histopathology and immunohistochemistry, most procedural errors can be corrected. Stains can be removed and reapplied. Tissues that were improperly processed can be reverse-processed and re-embedded. Coverslips with bubbles can be reset. Fixation tissue errors are the single exception.
Once tissue has been inadequately fixed, over-fixed, or mechanically damaged before fixation is complete, the resulting fixation artifacts are chemically encoded into the tissue matrix. No downstream antigen retrieval protocol, no matter how optimized, can fully restore what was lost at this stage. For researchers performing longitudinal biomarker tracking using IHC, this means that a single deviation from a validated fixation protocol can invalidate an entire sample cohort.
Critical Fact
According to quality assurance data from proficiency testing programs, poor fixation (excessive or incomplete) accounts for a majority of all fixation and processing errors observed on H&E-stained slides across tissue types including breast, colon, lymph node, and liver specimens.
Fixatives denature macromolecules by changing the shape of large proteins. This denaturation kills enzymatic activity, prevents microbial attack, firms tissue for sectioning, and—critically—alters how the tissue interacts with antibodies and stains. Formaldehyde-based fixatives form methylene cross-links between amino acid residues, stabilizing protein structure but simultaneously masking epitopes that IHC antibodies need to bind.
Different fixatives produce distinct morphological patterns. What appears as acceptable preservation under one regime may look like an artifact under another. Understanding these mechanisms allows researchers to select conditions that preserve the specific antigens relevant to their study without compromising tissue morphology.
The fixation process is a critical determinant of tissue preservation, influencing antigen accessibility, morphology, and the reliability of downstream immunohistochemical staining results.
Photomicrograph Comparison Placeholder
Well-fixed tissue (left) showing crisp nuclear membranes and defined cell boundaries vs. poorly fixed tissue (right) showing nuclear bubbling and artifactual spaces.
Mechanical trauma introduced during tissue collection is one of the most underappreciated sources of fixation artifacts. Crushing, stretching, or compressing tissue with forceps or clamps disrupts cellular architecture and creates localized zones where fixative penetration is physically blocked. In those compressed areas, the tissue remains unfixed while the surrounding regions cross-link normally, producing heterogeneous staining that cannot be attributed to biology.
For IHC biomarker panels—particularly for immune cell markers such as CD3, CD8, PD-L1, and Ki-67—localized mechanical artifacts can produce false-negative regions that misrepresent the true immune microenvironment landscape within a tumor section.
From the moment blood supply is interrupted, two simultaneous processes begin degrading the tissue. First, autolysis: the cell's own enzymes begin digesting cellular components. Second, desiccation: if the specimen is exposed to air, surface evaporation causes cellular shrinkage and morphological distortion within minutes.
Both processes create fixation artifacts that mimic pathological findings, making it critically important to minimize both the ischemic interval (time from devascularization to fixation) and any period of specimen drying.
Research in breast pathology has demonstrated that prolonged cold ischemic time directly alters IHC detection of estrogen receptor (ER), progesterone receptor (PR), HER2, and Ki-67—all biomarkers routinely used to guide treatment decisions and longitudinal monitoring of disease progression. Even incremental delays in fixation have been associated with measurable shifts in receptor scoring, which can have significant implications for inter-laboratory comparability in multi-center studies.
Best Practice
If immediate fixation is not possible, cover the specimen with saline-moistened gauze to maintain surface hydration. Transfer to fixative as soon as possible. Standardize ischemic time across all samples in a study cohort to ensure that observed differences in biomarker staining reflect biology rather than pre-analytical variability.
Line Chart Placeholder: Ischemic Time vs. Biomarker Signal Integrity
Duration of fixation sits at the center of an unavoidable trade-off: too little fixation and tissue morphology degrades, too much and antibody-accessible epitopes become permanently masked. Getting this balance right is not optional—it is the primary determinant of IHC staining quality.
| Condition | Cause | Tissue Effect | IHC Consequence | Severity |
|---|---|---|---|---|
| Under-fixation | Fixation time too short; oversized tissue block | Autolysis, poor morphology, "nuclear meltdown" pattern | Target protein degradation; artifactual staining when alcohols contact unfixed regions | High |
| Over-fixation | Fixation time too long; elevated temperature | Excessive cross-linking, tissue brittleness | Reduced epitope accessibility; antigen retrieval may improve detection; strong non-specific background staining | Moderate–High |
| Uneven fixation | Tissue too thick; insufficient fixative volume | Well-fixed periphery, autolytic core | Heterogeneous staining that may be misinterpreted as biological variation | High |
| Delayed fixation | Extended ischemic interval | Pre-fixation autolysis; antigen redistribution | Reduced biomarker detectability; false-negative IHC results | High |
| Optimal fixation | Validated protocol, correct ratio, timely initiation | Well-preserved morphology, defined nuclear membranes, no cell shrinkage | Reliable, reproducible antibody binding; accurate biomarker scoring | Optimal |
A well-fixed tissue section stained with H&E should display a variety of chromatin patterns with crisp blue nuclear membranes, no nuclear bubbling or smudginess, well-preserved cell cytoplasm with good eosin uptake, and no artifactual intercellular spaces or cell shrinkage. These morphological criteria are the visible proxy for the biochemical state that supports accurate IHC staining.
Fixatives are not freely porous. Formaldehyde diffuses through tissue at a finite rate, crossing membrane barriers cell by cell. This means that the fixation of a 3 cm biopsy core is not simply a larger version of fixing a 3 mm punch—it requires proportionally more time and volume, and even then, uniformity cannot be assumed unless the physical constraints are correct.
Use at least a 1:10 ratio (tissue volume to fixative volume). A 1:20 ratio is recommended for dense or bloody specimens to ensure adequate buffering capacity.
Select containers wide enough that tissue lies flat and fully submerged without folding or compression against the container walls.
Slice specimens to no more than 3–5 mm thickness before fixation. Slicing unfixed tissue promotes rapid, uniform penetration of fixative to the center of each slice.
Gently rinse heavily blood-contaminated specimens with physiological saline before fixation. Blood proteins consume fixative and reduce fixation efficiency, leading to artifacts.
Temperature Note
Fixation at room temperature is standard. Higher temperatures accelerate fixative penetration but also accelerate autolysis—the same enzyme-mediated tissue destruction you are trying to prevent. Avoid heated fixation unless your protocol has been specifically validated for your target antigen and tissue type.
No single fixative is universally optimal for all IHC applications. The choice of fixative determines not only how well the tissue is preserved morphologically, but which antigens remain accessible, how stable post-translational modifications are, and whether downstream molecular analyses (RNA extraction, DNA analysis) remain viable. Preserve antigenicity for IHC by selecting fixatives and conditions that are specifically compatible with your target epitopes.
Neutral Buffered Formalin (10% NBF)
Cross-linking fixative. Gold standard for routine histopathology and most IHC biomarkers. Forms methylene bridges between proteins.
Ethanol / Methanol (70–95%)
Precipitating fixative. Removes water to expose hydrophobic proteins. Better antigenicity preservation; not recommended for phosphorylated targets.
4% Paraformaldehyde (PFA)
Preferred for research-grade perfusion fixation and frozen sections. High purity cross-linking with better antigenicity than standard formalin.
Formalin quality degrades with storage. Unbuffered or acidic formalin reacts with hemoglobin in blood-rich tissues to form a black-brown crystalline deposit known as formalin pigment (acid hematin). This artifact obscures tissue detail and can interfere with chromogenic IHC detection. Use only high-quality, commercially buffered NBF from validated suppliers, monitor pH regularly, and prepare or aliquot formaldehyde solutions fresh to reduce formic acid accumulation.
Phosphoprotein Note
If your IHC panel includes phosphorylated proteins (e.g., pERK, pAKT, pHER2), standard formalin fixation may cause intracellular translocation of phosphorylation-dependent epitopes from the membrane to the cytoplasm, creating artifactual staining patterns. Consider ice-cold methanol or ethanol for these specific targets.
A validated fixation protocol is not a one-time document—it is a living standard operating procedure (SOP) that must be trained, monitored, and audited. The following step-by-step framework addresses every variable shown to contribute to fixation artifacts in IHC, aligned with regulatory guidelines and current best practices in biomarker reproducibility.
Establish maximum allowable cold ischemic times for each tissue category in your study. Document time-to-fixation for every specimen and flag deviations as exclusion criteria.
Test your primary antibodies on tissue fixed under the conditions your SOP specifies. Run antibody validation across fixation time points (e.g., 6, 12, 24, 48, 72 h) to identify the optimal window for your targets.
Document required tissue slice thickness, container dimensions, tissue-to-fixative ratio, and labeling requirements. Provide visual aids at specimen collection stations.
Specify fixation at room temperature unless perfusion protocols require otherwise. Set upper and lower time limits. Use timers and log sheets to track fixation start and end times.
Check fixative pH at each use. Document batch numbers, preparation dates, and expiration dates. Discard fixative that shows discoloration, precipitation, or pH below 6.8.
Before every IHC run, assess tissue quality on H&E using defined acceptance criteria: nuclear membrane crispness, absence of bubbling, no artifactual intercellular spaces, and adequate eosin staining.
For longitudinal and multi-site studies, use commercially validated, IHC-grade fixation reagents with certificate of analysis documentation to minimize lot-to-lot variability in fixative composition.
Diagram Placeholder
Flowchart: specimen type → ischemic time window → fixative selection → fixation duration range → QC checkpoint → proceed to processing
What steps should I follow to set up a lab protocol that reduces fixation artifacts?
Standardize fixation time, use appropriate fixatives, control tissue thickness, and follow validated IHC processing procedures.
How do I request a price list for tissue fixation products that prevent artifacts?
Contact the supplier directly through their sales team or website and request a current product catalog and pricing information.
How can I schedule a consultation to learn about optimizing tissue fixation techniques?
Reach out to a technical support specialist or application scientist through your preferred supplier’s customer service channels.
Where can I order high-quality fixation kits specifically designed for IHC applications?
Fixation kits can be ordered directly from leading laboratory suppliers and authorized distributors specializing in IHC reagents and consumables.