This website uses cookies to ensure you get the best experience on our website.
- Table of Contents
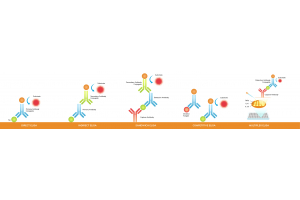
The common problem for all fluorescence-based cell detection methods is the cells’ natural fluorescence. Cellular autofluorescence is due to the presence of various biological structures, such as collagen, elastin, NADPH, flavins, mitochondria, and lysosomes, which usually absorb in UV to blue range (355-488 nm) and emit in the blue to green range (350-550 nm). Therefore, autofluorescence interferes with analysis by reducing signal sensitivity and resolution of fluorochromes that operate in that range – FITC, GFP, and Pacific Blue to name a few.
To subtract this background and prevent false positives, it is crucial to include unstained controls and set proper PMTs and gating. However, it is even more important to minimize autofluorescence as much as possible. Below are some handy tips to follow.
Fetal calf serum (FCS) absorbs at the violet and blue spectra. Therefore, serum present in FACS buffer as well as the culture medium can increase autofluorescence. It is critical to standardize the optimum concentration of FCS in the staining buffer to strike a compromise between blocking non-specific antibody binding and minimizing autofluorescence. Most labs use FCS at 1% to 10%. From our experience, lower concentrations of FCS work as well as 10%. If low FCS concentration does not remove autofluorescence, we suggest switching to bovine serum albumin (BSA).
Dead cells can bind non-specifically with a lot of reagents, increase autofluorescence significantly, and alter scatter properties. The presence of extracellular matrix debris also contributes to autofluorescence through collagen and elastin. Removal of dead cells and debris is an easy procedure. Low speed spinning, Ficoll gradient centrifugation, or incubation with DNase I – any one of these can effectively get rid of dead cells. In addition, you can include a live/dead cell discriminating dye to gate out the dead cells prior to gating other sub-populations.
The RBC pigment hemoglobin has been shown to absorb at 541 and 577 nm, which can interfere with the fluorescence signals of PE and PE-related tandem dyes. Unlysed RBCs and lingering lysed RBC contents in cell preparations are common problems when working with whole blood or buffy coats. Make sure the RBC lysis buffer that you are using is working properly and follow the lysis protocol carefully. Wash the cells several times with PBS to remove any traces of free hemoglobin from the lysed RBCs.
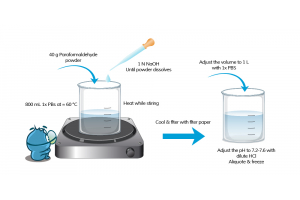
All aldehyde fixatives react with the amines and proteins to form fluorescing molecules, which increase with rising PFA concentration and exposure duration of cells to PFA. Titrate the PFA concentration to determine the lowest concentration that works. For example, 0.5% solution of PFA could work just as fine as a 4% solution. It is always better to analyze the cells soon after staining. However, if you need to fix the cells for storing, analyze them within 24 hours.
If your cells are naturally fluorescent (e.g. neutrophils), then the best strategy is to create a color panel that can overcome autofluorescence. For this situation, autofluorescence cannot be removed because it is a real signal. As a result, the best thing to do is to choose the brightest fluorochromes available – PE, APC, and their tandem versions – so that the autofluorescence becomes irrelevant. Another point to keep in mind is that autofluorescence is generally detected at shorter light wavelengths. Thus, you can consider shifting your panel to the “redder” side of the spectrum. For example, if possible, replace FITC with Alexa Fluor 488 and PerCP with PerCP-Cy5.5.